Best DIY Bed Bug Treatment Kit: Complete Home Bundle That Actually Works

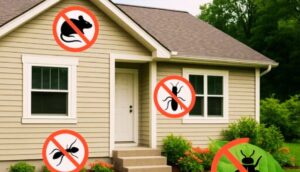
Bed bugs are one of the hardest pests to remove from a home. They hide deep inside mattresses, bed frames, couches, and tiny wall cracks.
Worse, they reproduce fast.
Many homeowners spray one product and expect instant results. Unfortunately, that rarely works.
A complete DIY bed bug treatment bundle works better because it attacks bed bugs at every stage of their life cycle.
Steam kills live bugs and eggs on contact. Mattress encasements trap hidden bugs.
Traps help monitor activity. Sprays kill exposed insects. Dust reaches deep cracks where sprays cannot.
Instead of relying on one treatment method, a layered approach gives better long-term control.
That is why professional exterminators often combine several products together.
The good news is you can now build a highly effective DIY bed bug elimination kit at home using Amazon best sellers and Top Choice products.
Why Bed Bugs Feel Impossible to Get Rid Of (And Why Waiting Makes It Worse)
If you’ve ever dealt with bed bugs, you already know it’s not just a “pest problem.” It quickly turns into a daily stress problem.
At first, it might just be a few itchy bites in the morning. Easy to ignore.
But within days, things can escalate fast—waking up with new bites, spotting tiny stains on your sheets, and suddenly wondering if they’ve spread to the couch, clothes, or even another room.
What makes bed bugs especially frustrating is how easily they stay hidden.
You can clean, spray, and even rearrange your room, and still feel like nothing is changing.
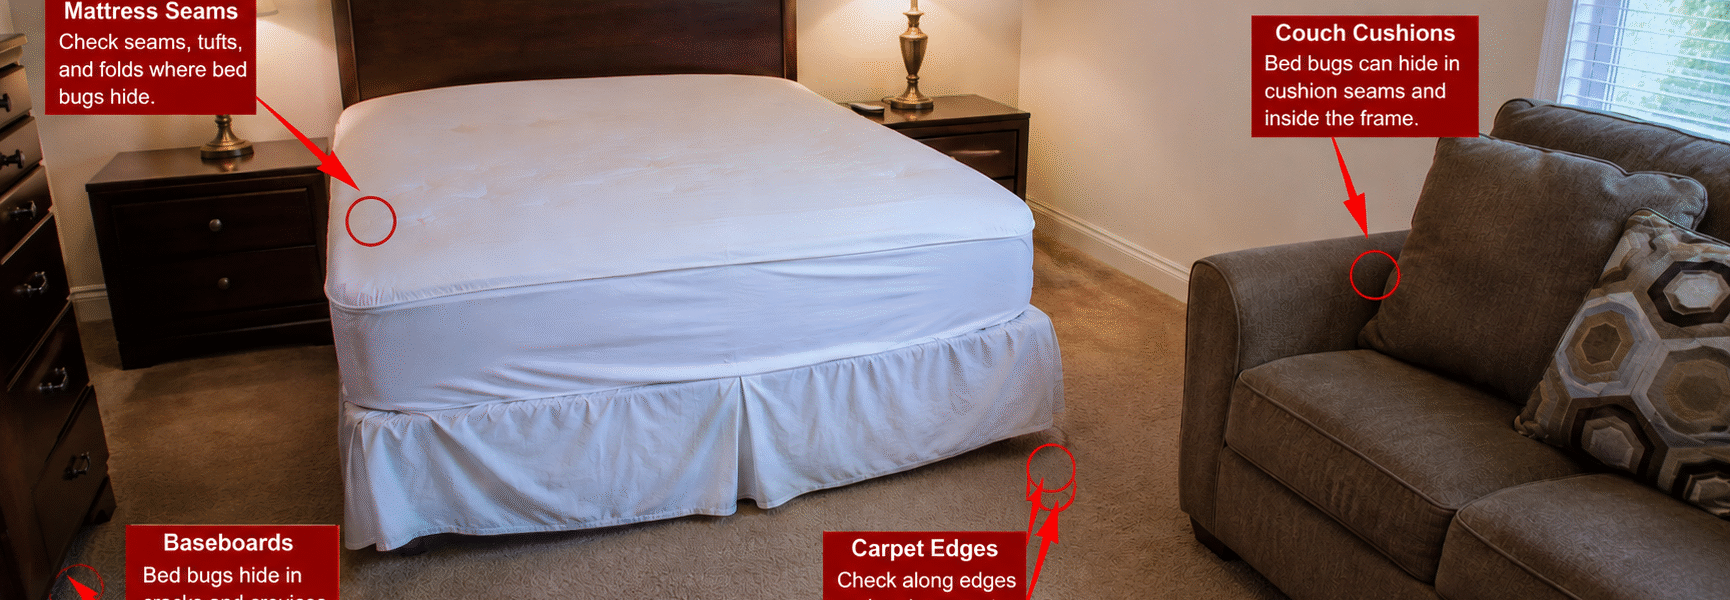
That’s because they don’t stay out in the open—they hide deep inside mattress seams, furniture joints, baseboards, and even electrical outlets.
And while this is happening, they reproduce quietly in the background. So even when you think you’ve handled part of the problem, more are already developing nearby.
There’s also the financial side most people don’t expect.
Calling a professional exterminator can easily cost anywhere from $300 to $1,500 or more per treatment, especially if multiple visits are needed. For many households, that’s simply not an easy option.
So people often turn to DIY solutions first—but that can lead to frustration if they only try one method, like a spray, and expect instant results.
On top of everything, there’s the emotional toll. Bed bugs can feel embarrassing, even though they have nothing to do with cleanliness. Many people avoid telling friends, hesitate to invite guests over, or start losing sleep just thinking about the problem spreading.
The truth is, bed bugs don’t respond well to single-step treatments. That’s why partial efforts often lead to repeated infestations and ongoing stress.
This is exactly why a complete, layered DIY treatment system works better—it doesn’t rely on one weak point. Instead, it targets bed bugs in multiple ways at the same time, which is what actually breaks the cycle.
For the best results, combine heat, monitoring, sprays, and residual dust together instead of using a single product.
Affiliate Disclosure: This page contains affiliate links. If you buy through my links, I may earn a small commission at no extra cost to you.
As an Amazon Associate, I earn from qualifying purchases.
Quick Best For Box
Best DIY Bed Bug Treatment Bundle For:
- Homeowners dealing with early to moderate infestations
- Apartment renters needing a non-professional solution
- Families wanting a complete bed bug control system
- Travelers trying to prevent bed bug spread
- People looking for a cheaper alternative to exterminators
⚠️ Who This DIY Bed Bug Treatment Kit Is NOT For
This DIY bed bug treatment bundle can be very effective, but it’s not the right solution for every situation.
First, if you’re dealing with a severe, widespread infestation across multiple rooms or floors, this kit alone may not be enough.
When bed bugs have fully taken over a home, professional-grade heat treatments or multiple exterminator visits are often required to fully eliminate them.
Second, this is not a “one-and-done” solution. If you’re looking for a single spray or one-time treatment that instantly removes every bed bug overnight, this approach may feel frustrating.
Bed bug control usually requires repeat treatments, follow-ups, and monitoring over several weeks to fully break the life cycle.
Third, this bundle is not ideal for anyone who is not willing to stay consistent with the process. Each product works best as part of a system—steam, sprays, dust, traps, and encasements all play different roles.
Skipping steps or stopping too early can reduce results significantly.
This kit also may not be the best fit for people who prefer a completely hands-off solution. DIY bed bug control requires some effort, attention to detail, and patience while the treatment runs its course.
⭐ Best DIY Bed Bug Treatment Bundle For:
✔ Homeowners dealing with early to moderate bed bug infestations
✔ Apartment renters needing a safe, non-professional solution
✔ Families wanting a complete at-home bed bug control system
✔ Travelers aiming to prevent bringing bed bugs home or spreading them
✔ People looking for a more affordable alternative to exterminators
👉 Best for: Fast, effective, at-home bed bug control without harsh chemicals
Top Pick Summary Box
Recommended DIY Bed Bug Bundle
| Product Type | Top Pick |
|---|---|
| Steamer | Dupray Neat Steam Cleaner |
| Mattress Encasement | SafeRest Premium Mattress Encasement |
| Bed Bug Traps | Ortho Bed Bug Interceptors |
| Bed Bug Spray | Ortho Home Defense Max Bed Bug Killer |
| Bed Bug Dust | Harris Bed Bug Killer Diatomaceous Earth Powder |
Why This Bundle Works
This combination creates a full treatment system. The steamer kills bugs instantly. The spray eliminates active infestations. Dust keeps working inside cracks for weeks. Traps monitor remaining activity. Mattress encasements stop hidden bugs from escaping or feeding.
Want to stop bed bugs before they spread through your entire home? Check current prices and build your complete DIY bed bug treatment kit on Amazon today.
Recommended Comparison Table
| Product Name | Purpose | Best Use | Indoor/Outdoor | Main Benefit |
| Dupray Neat Steam Cleaner | Kills bed bugs and eggs with heat | Mattresses, couches, seams | Indoor | Chemical-free instant kill |
| SafeRest Premium Mattress Encasement | Traps hidden bed bugs | Mattresses and box springs | Indoor | Prevents bites and reinfestation |
| Ortho Bed Bug Interceptors | Detects and traps bed bugs | Under bed legs | Indoor | Monitors infestation activity |
| Ortho Home Defense Max Bed Bug Killer | Kills active bed bugs | Cracks, furniture, baseboards | Indoor | Fast knockdown treatment |
| Harris Bed Bug Killer Dust | Long-lasting residual control | Wall voids and crevices | Indoor | Continues killing for weeks |
What This DIY Bed Bug Treatment Bundle Costs (And Why It Saves You Money)
Before putting together a DIY bed bug treatment kit, it helps to understand the real cost involved—because most people assume it’s either “cheap and ineffective” or “expensive like hiring an exterminator.”
The truth sits somewhere in the middle, but it’s still far more affordable than professional treatment.
A complete DIY bed bug bundle like the one in this guide typically costs around $150 to $300 total, depending on the brands and sizes you choose. This includes the steamer, mattress encasement, spray, dust, and interception traps.
At first glance, that might feel like a lot for home products—but it’s important to compare it to professional extermination services.
Hiring a pest control company for bed bugs usually starts around $300 and can easily go up to $1,500 or more, especially if the infestation has spread or requires multiple visits.
In many cases, one treatment is not enough, which means the cost can increase quickly over time.
That’s where DIY becomes much more appealing. Instead of paying per visit, you’re investing once in a full system that you can reuse, maintain, and control on your own schedule.
Budget vs Premium DIY Setup
Not every DIY kit has to be built the same way. There are two simple approaches:
✔ Budget DIY Setup (~$150–$200):
Focuses on essentials like a basic steamer, bed bug spray, and traps. This works best for early-stage infestations or prevention.
✔ Premium DIY Setup (~$250–$300+):
Includes everything in the budget kit plus higher-quality encasements, stronger residual dust, and a more powerful steamer. This is better for moderate infestations or recurring problems
Why These Bed Bug Products Work Better Together
Many DIY bed bug treatments fail because people only use sprays. Sadly, sprays alone cannot reach every hiding spot. Bed bugs hide inside wall cracks, furniture joints, mattress seams, and electrical outlets.
This bundle solves that problem by using multiple treatment methods together.
- Steam kills visible bugs and eggs instantly
- Mattress encasements trap hidden bugs
- Traps help track infestation levels
- Spray kills active bed bugs on surfaces
- Dust creates long-lasting residual protection
Together, these products create a complete system instead of a temporary fix.
1. Dupray Neat Steam Cleaner Review
Why It Is One Of The Best Steamers For Bed Bugs
The Dupray Neat Steam Cleaner is one of Amazon’s most popular steam cleaners for pest control. It produces high-temperature steam that can kill bed bugs and eggs on contact without harsh chemicals.
Heat is one of the most effective ways to destroy bed bugs. This steamer reaches deep into mattress seams, furniture cracks, curtains, and upholstery.
Because bed bug eggs are resistant to many pesticides, steam adds an important extra layer of control.
Best For

- Chemical-free treatment
- Families with children or pets
- Mattresses and upholstered furniture
- Treating bed bug eggs
Pros
- High-temperature steam
- No chemical odor
- Works on many surfaces
- Large water tank
- Strong Amazon ratings
Cons
- Takes time to treat large rooms
- Requires patience and slow passes
Why It Works With This Bundle
Steam quickly reduces active populations before applying spray and dust. This makes the other products more effective.
Want professional-level heat treatment at home? Check the latest price for the Dupray Neat Steam Cleaner on Amazon.
Internal Link Placement Suggestion: Link here to: “Can Steam Really Kill Bed Bugs?”
2. SafeRest Premium Mattress Encasement Review
Why Mattress Encasements Matter
Mattress encasements are often overlooked. However, they play a major role in bed bug control.
The SafeRest Premium Mattress Encasement seals your mattress completely. This traps any hidden bed bugs inside while blocking new bugs from entering.
It also makes future inspections easier because bed bugs cannot hide inside the mattress.
Best For

- Protecting mattresses
- Preventing reinfestation
- Apartment living
- Long-term bed bug prevention
Pros
- Waterproof protection
- Zipper locks tightly
- Soft and breathable material
- Easy to install
- Helps reduce bites
Cons
- Must stay sealed for long periods
- May not fit extra-thick mattresses perfectly
Why It Works With This Bundle
After steaming and spraying the mattress, the encasement traps any remaining bugs. This helps stop the infestation cycle.
Protect your mattress before bed bugs spread deeper into your home. See current SafeRest mattress encasement prices on Amazon.
3. Ortho Bed Bug Interceptors Review
Why Bed Bug Traps Help Monitor Activity
Bed bug traps are important because they help confirm whether treatment is working.
Ortho Bed Bug Interceptors sit under bed legs and furniture legs. Bed bugs climb into the trap but cannot escape.
This gives homeowners a simple way to monitor infestations without expensive inspections.
Best For

- Monitoring infestations
- Apartment bedrooms
- Detecting lingering bed bugs
- Post-treatment inspections
Pros
- Easy to use
- Non-toxic
- Affordable
- Helps track activity
- No chemicals required
Cons
- Does not kill hidden infestations alone
- Requires furniture legs for placement
Why It Works With This Bundle
These traps help determine whether the spray, steam, and dust treatments are reducing bed bug activity.
Want to know if bed bugs are still active in your bedroom? Check today’s price for Ortho Bed Bug Interceptors on Amazon.
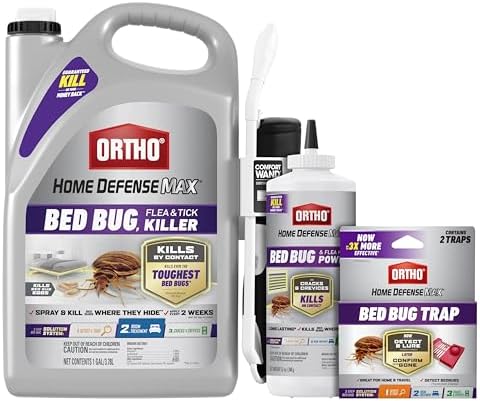
4. Ortho Home Defense Max Bed Bug Killer Review
One Of Amazon’s Most Popular Bed Bug Sprays
A quality spray remains an important part of any DIY bed bug treatment kit.
Ortho Home Defense Max Bed Bug Killer is designed to kill bed bugs fast on mattresses, furniture, bed frames, and baseboards.
It also continues working after application, helping reduce surviving bugs.
Best For
- Active infestations
- Furniture treatment
- Baseboards and cracks
- Quick knockdown results
Pros
- Fast-acting formula
- Easy spray application
- Good coverage area
- Trusted brand
- Strong Amazon reviews
Cons
- Chemical smell during use
- Requires repeat applications
Why It Works With This Bundle
The spray quickly lowers visible populations while dust handles hidden areas and steam destroys eggs.
Stop active bed bugs before they spread to other rooms. Check current Amazon pricing for Ortho Home Defense Max Bed Bug Killer.
5. Harris Bed Bug Killer Dust Review
Why Bed Bug Dust Is So Important
Bed bug dust reaches places sprays often miss.
Harris Bed Bug Killer Dust uses diatomaceous earth to damage the protective coating on bed bugs. This causes dehydration over time.
Unlike sprays that dry quickly, dust can continue working for weeks in cracks and hidden spaces.
Best For

- Wall voids
- Baseboards
- Long-term residual control
- Hidden bed bug areas
Pros
- Long-lasting protection
- Reaches small cracks
- Low odor
- Easy application
- Works continuously
Cons
- Can become messy if overapplied
- Slower than direct sprays
Why It Works With This Bundle
Dust provides long-term protection after steaming and spraying are finished.
Add long-lasting residual protection to your treatment plan. See the latest Harris Bed Bug Dust pricing on Amazon.
How To Use This DIY Bed Bug Treatment Bundle Together
For the best results, follow this order:
- Vacuum all affected rooms thoroughly
- Use the steamer on mattresses, seams, furniture, and cracks
- Apply bed bug spray to active areas
- Add dust inside cracks, outlets, and baseboards
- Install mattress encasements
- Place interceptors under bed legs
- Repeat inspections weekly
This layered method improves success rates dramatically.
Step-by-Step Bed Bug Treatment Timeline (What to Expect Week by Week)
One of the biggest challenges with DIY bed bug control is not knowing what “progress” should actually look like. It’s easy to feel like nothing is working after the first treatment, even when it is—you just need a clear timeline.
Here’s a simple breakdown of what your treatment process should look like over time:
Day 1: Deep Cleaning + First Full Treatment
This is your strongest starting point.
Begin by thoroughly vacuuming all affected areas, including mattresses, bed frames, carpets, and furniture edges. After that, use steam on high-risk spots like mattress seams, couch cushions, and cracks in furniture.
Once steaming is done, apply your bed bug spray to visible problem areas and surfaces where bed bugs are likely to travel.
This first step reduces the active population and disrupts their hiding spots.
Week 1: Monitoring + Follow-Up Spray
During the first week, you’ll likely still notice some activity—that’s normal.
Reapply spray to targeted areas and check your bed bug interceptors daily. These traps help you see whether bugs are still moving around or if activity is slowing down.
You may still see occasional bites or sightings, but the goal here is reduction, not instant elimination.
Weeks 2–3: Dust Application + Ongoing Control
At this stage, you can introduce bed bug dust into cracks, baseboards, wall gaps, and other hidden areas.
This is where the long-term control begins. While sprays and steam handle surface bugs, the dust works slowly but continuously in hard-to-reach places.
Continue checking traps and monitoring any signs of activity. Things should start to noticeably decrease during this phase.
Week 4: Confirmation Phase
By the fourth week, most active signs should be gone or extremely minimal.
Continue using interceptors to confirm there’s no new movement. If traps stay empty and no fresh bites appear, it’s a strong sign the infestation is under control.
At this point, you can maintain prevention steps like keeping encasements on mattresses and occasional trap monitoring.
Who Should Buy This DIY Bed Bug Bundle?
This bundle works best for:
- Early infestations
- Apartment bedrooms
- Guest rooms
- Travelers bringing luggage home
- Families wanting a full DIY solution
- Homeowners trying to avoid exterminator costs
However, severe infestations may still require professional treatment.